
I started to put this in the gunsmithing section, but I figure it is more applicable here.
I'm sure this is not news to most people familiar with building and modifying an AR platform, but I found a way to get a pretty decent trigger without spending big $$$ on a drop in. Of course, I forgot to take pictures when I did this, but I will do my best to substitute.
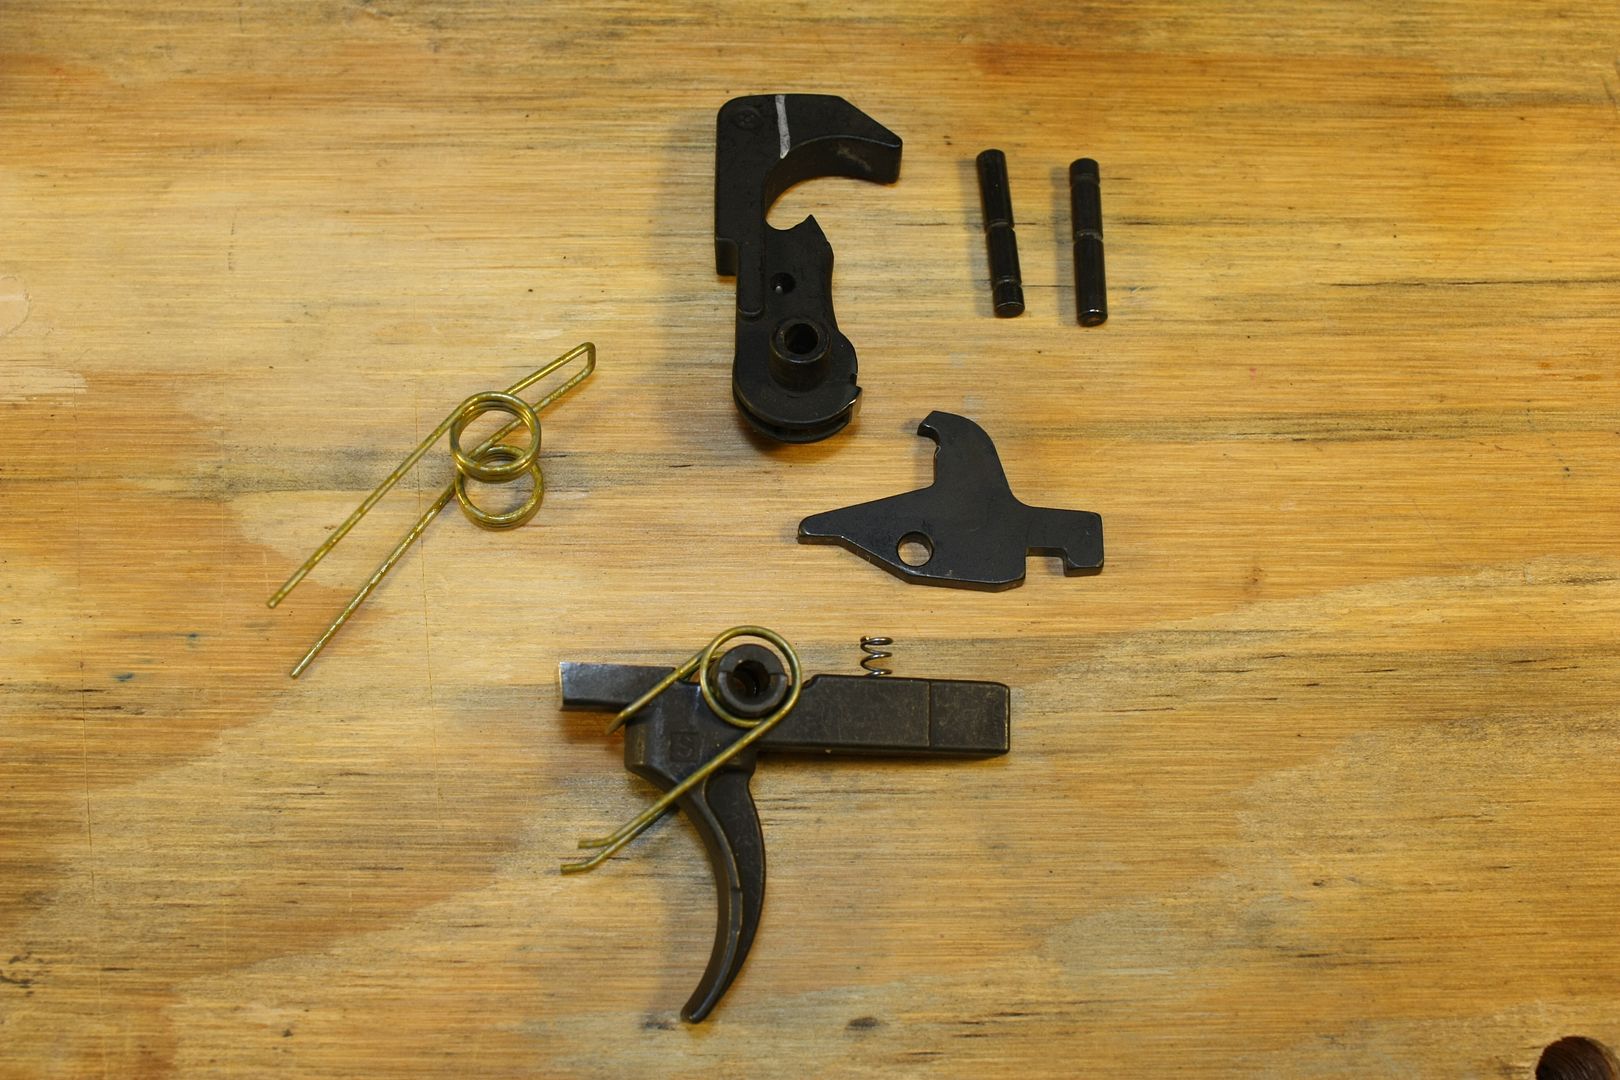
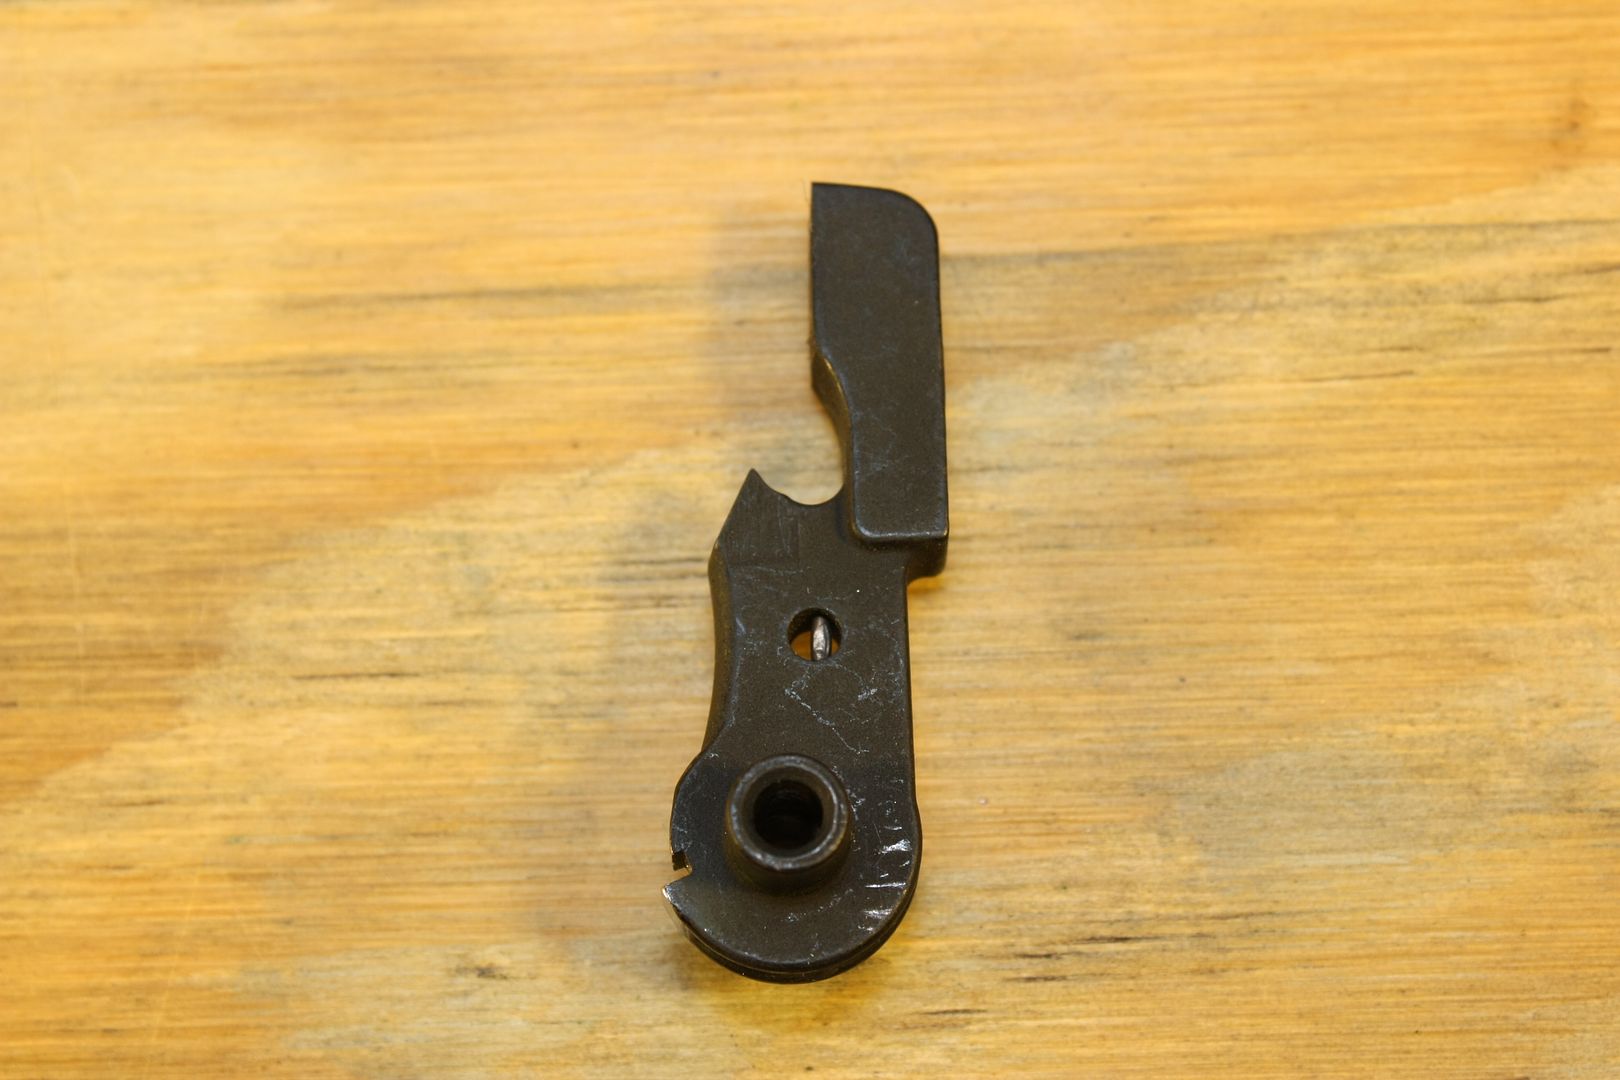
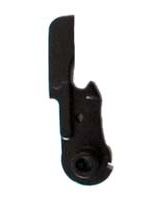
I started off with a basic mil-spec trigger that comes standard with most LPK's. I polished the sear surfaces, then I cut the tail off the hammer.
It looks like this with maybe just a little more metal left on it.
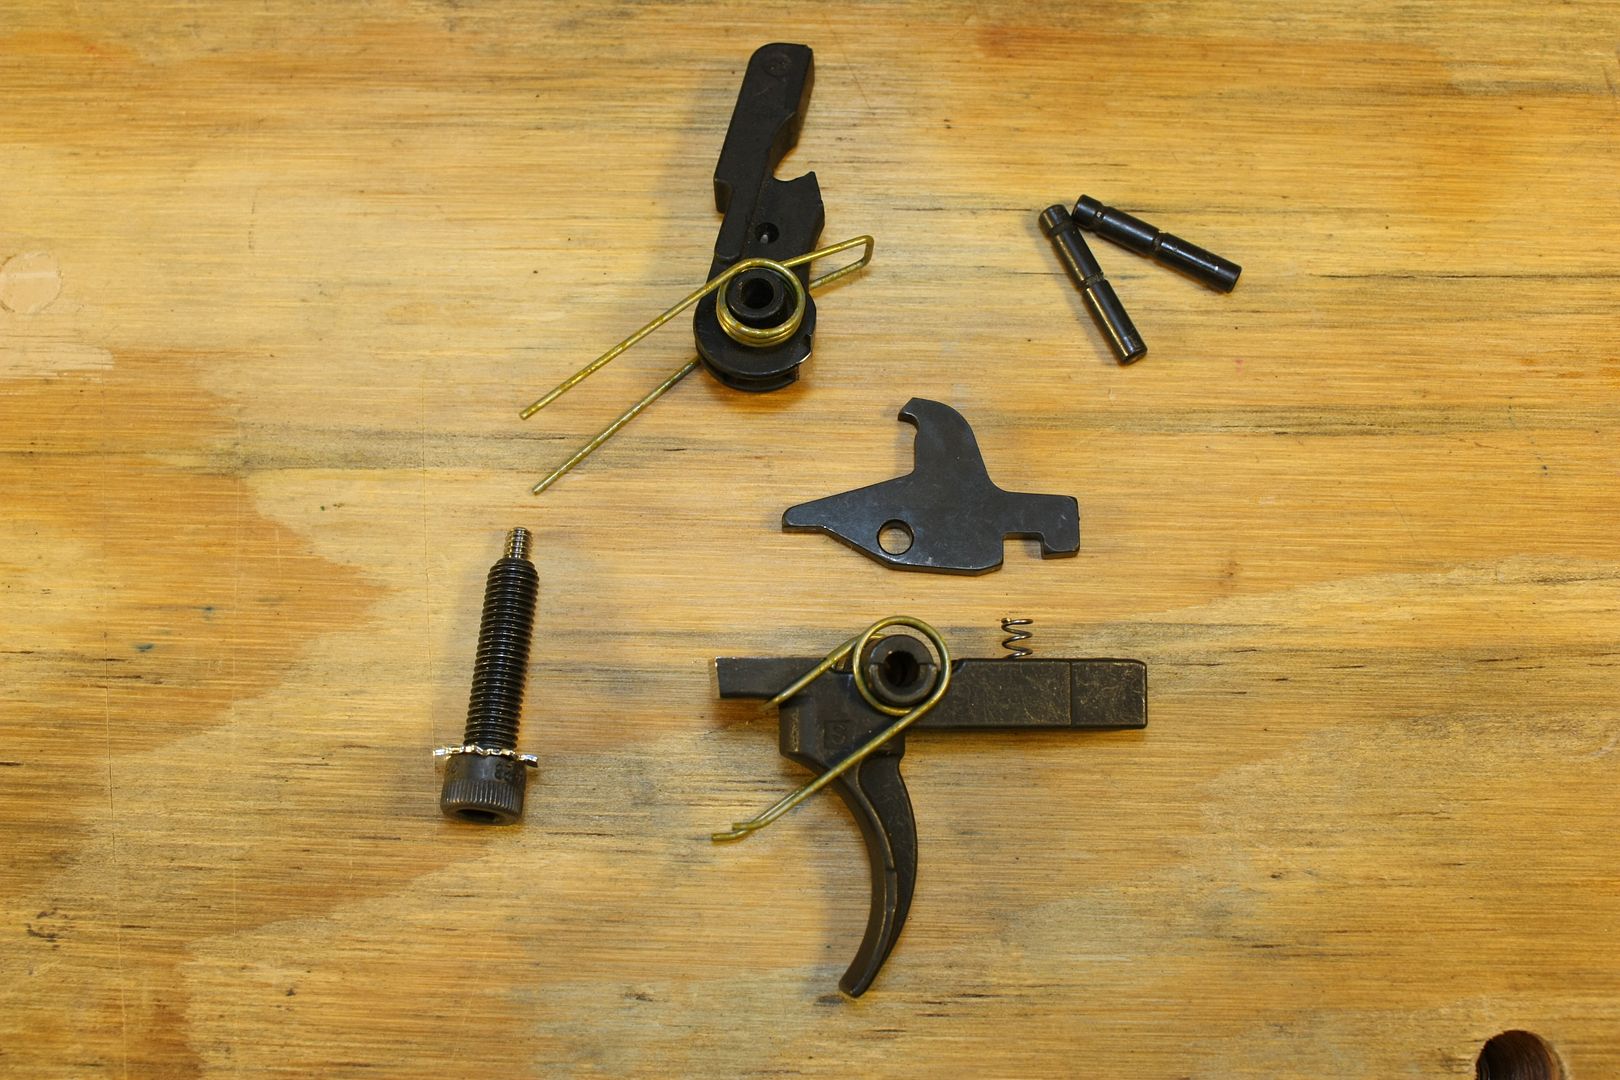
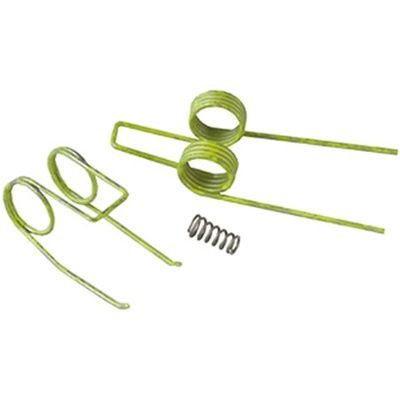
After that, I installed the JP Enterprises Reduced Power (yellow) Spring Kit and re-installed the trigger group.
After installing the JP spring kit, the trigger pull was significantly lighter; however, there was still quite a bit of creep. I read where some people have tapped a hole and installed a set screw under the safety to reduce the creep. I considered doing that until I found this:
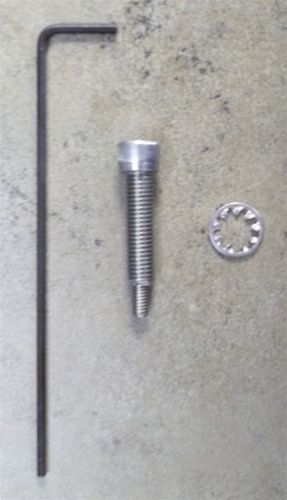
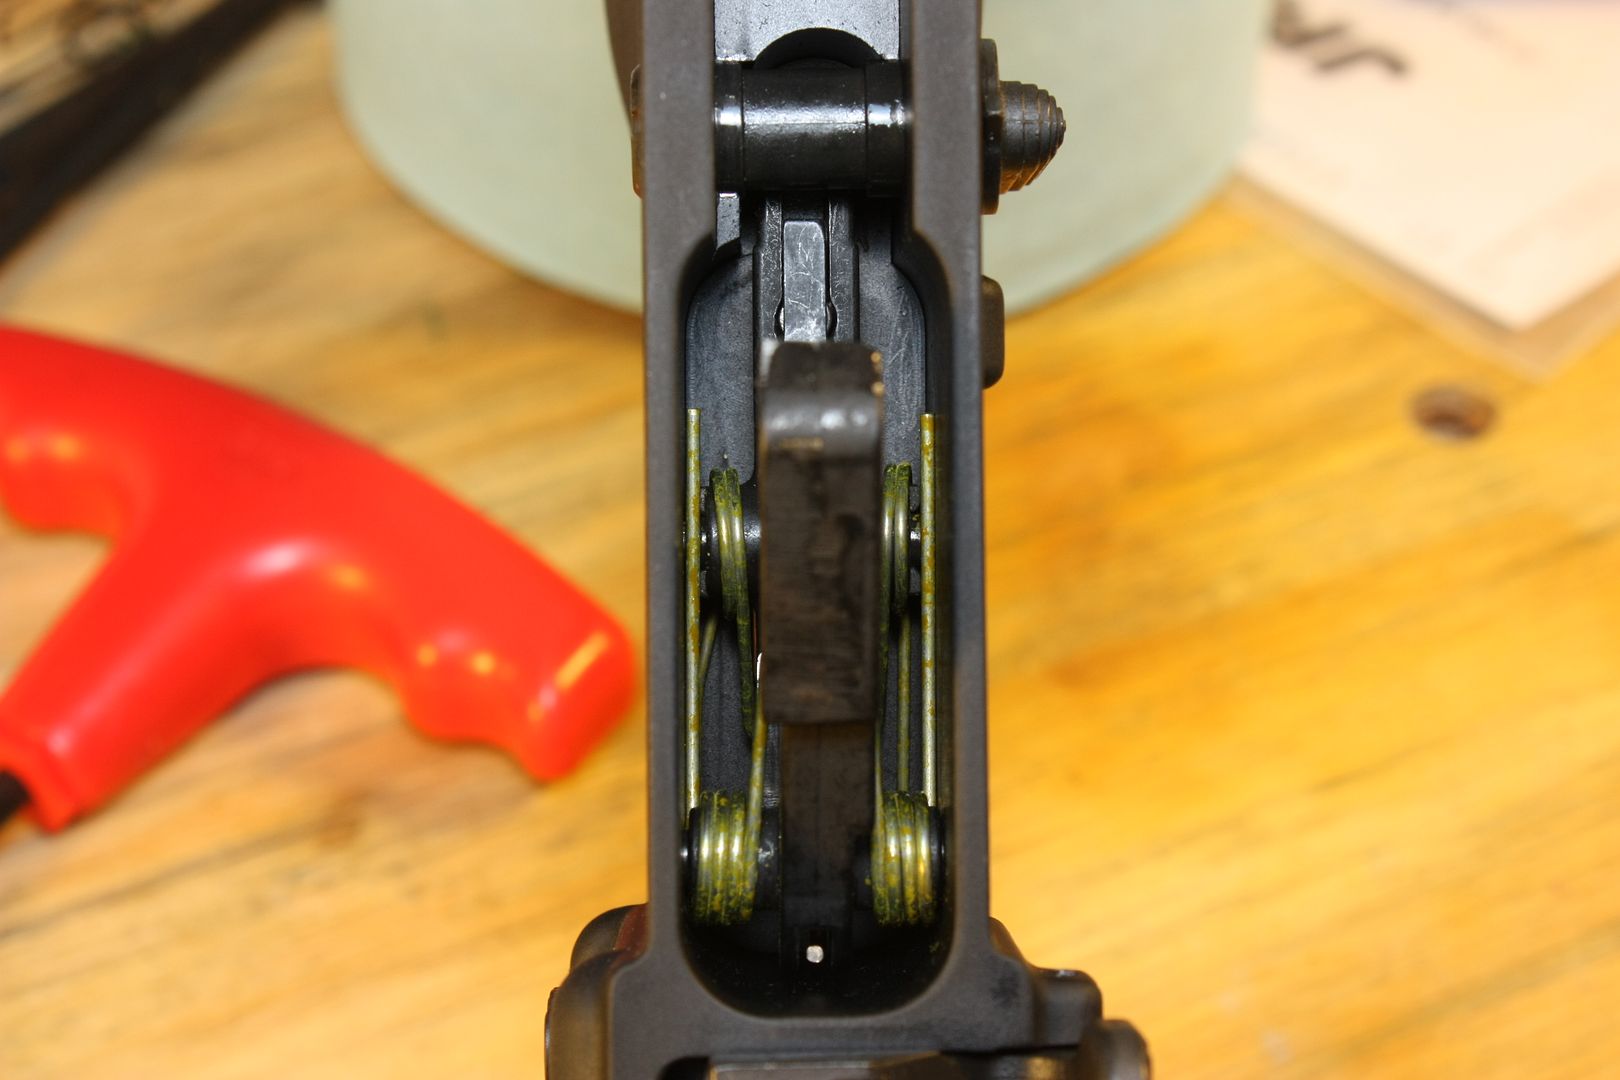
This "trigger adjuster" utilizes a set screw inside a replacement grip screw to reduce creep. Basically you install the grip screw as normal, then use the supplied allen wrench to tighten the set screw inside until it stops. At this point, the safety selector should not be able to move. Then you back off the set screw 1/8 of a turn at a time until the safety selector moves freely. At this point, most of the trigger pre-travel should be gone.
I don't have a trigger pull gauge, but I can tell that the pull is significantly lighter, smoother and with less creep.
I did this to my AR in January and have fired over 500 rounds since then without any hiccups. I just finished doing the exact same thing to my dad's AR last night for his father's day gift. I've never fired an AR with an expensive drop-in trigger group, but I'm sure this trigger "job" is nowhere near as nice as those. It is, however, a huge improvement for not much $$$.
I bought the JP spring kit from Gold Mine, but both the spring kit and the trigger adjuster can be found here for less than $35 shipped:
http://www.joeboboutfitters.com/JP_AR_15_REDUCED_POWER_SPRING_KIT_p/jp-jps3.5.htm
http://www.joeboboutfitters.com/JoeBob_s_Trigger_Adjuster_p/jb-triggeradjuster.htm (Edit: They have changed the trigger adjuster screw since I first ordered mine. I recommend spending the extra $4 and getting the hex driver that they offer. You can use a standard 1/16" allen wrench, but most of them are nowhere near long enough to reach all the way to the set screw inside the grip.)
I'm about to go on vacation, but I'll try to remember to take everything back apart and get step-by-step pictures when I get back. Until then, I'll be happy to answer any questions.
I finally got around to taking the pictures I said I would. Here is a link to the post further down in this thread: http://gulfcoastgunforum.com/showthread.php?9814-35-DIY-AR-Trigger-Job&p=102307&viewfull=1#post102307
Now with Video!!!
https://youtu.be/pCPLe6FwNkQ
I'm sure this is not news to most people familiar with building and modifying an AR platform, but I found a way to get a pretty decent trigger without spending big $$$ on a drop in. Of course, I forgot to take pictures when I did this, but I will do my best to substitute.
I started off with a basic mil-spec trigger that comes standard with most LPK's. I polished the sear surfaces, then I cut the tail off the hammer.
It looks like this with maybe just a little more metal left on it.
After that, I installed the JP Enterprises Reduced Power (yellow) Spring Kit and re-installed the trigger group.
After installing the JP spring kit, the trigger pull was significantly lighter; however, there was still quite a bit of creep. I read where some people have tapped a hole and installed a set screw under the safety to reduce the creep. I considered doing that until I found this:
This "trigger adjuster" utilizes a set screw inside a replacement grip screw to reduce creep. Basically you install the grip screw as normal, then use the supplied allen wrench to tighten the set screw inside until it stops. At this point, the safety selector should not be able to move. Then you back off the set screw 1/8 of a turn at a time until the safety selector moves freely. At this point, most of the trigger pre-travel should be gone.
I don't have a trigger pull gauge, but I can tell that the pull is significantly lighter, smoother and with less creep.
I did this to my AR in January and have fired over 500 rounds since then without any hiccups. I just finished doing the exact same thing to my dad's AR last night for his father's day gift. I've never fired an AR with an expensive drop-in trigger group, but I'm sure this trigger "job" is nowhere near as nice as those. It is, however, a huge improvement for not much $$$.
I bought the JP spring kit from Gold Mine, but both the spring kit and the trigger adjuster can be found here for less than $35 shipped:
http://www.joeboboutfitters.com/JP_AR_15_REDUCED_POWER_SPRING_KIT_p/jp-jps3.5.htm
http://www.joeboboutfitters.com/JoeBob_s_Trigger_Adjuster_p/jb-triggeradjuster.htm (Edit: They have changed the trigger adjuster screw since I first ordered mine. I recommend spending the extra $4 and getting the hex driver that they offer. You can use a standard 1/16" allen wrench, but most of them are nowhere near long enough to reach all the way to the set screw inside the grip.)
I'm about to go on vacation, but I'll try to remember to take everything back apart and get step-by-step pictures when I get back. Until then, I'll be happy to answer any questions.
I finally got around to taking the pictures I said I would. Here is a link to the post further down in this thread: http://gulfcoastgunforum.com/showthread.php?9814-35-DIY-AR-Trigger-Job&p=102307&viewfull=1#post102307
Now with Video!!!
https://youtu.be/pCPLe6FwNkQ
Last edited: